Huawei’s new P30 Pro is a fine phone. But for some unaccountable reason, the Chinese company has introduced an unnecessary item of bloatware. It pops up uninvited whenever you hit a Web link, recommends itself largely and loudly, and when you descend into the bowels of the system settings you discover that its impossible to uninstall or even disable.
Did I say impossible to uninstall? Linux expert, Paul O’Brien who was with me at the launch of the phone in Paris in March showed me how to banish the Browser, along with any other unwanted fixtures and fittings.
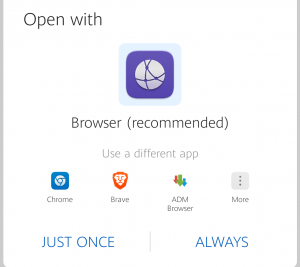
Huawei’s browser recommends itself, diminishing any other options you may have installed.
AS WELL AS THE PHONE (obviously) you’ll also need a PC, Mac or any computer capable of downloading and running the Android Debug Bridge. Those two items, together with a USB cable to connect them comprise the whole box of tricks.
The Android Debug Bridge (adb) is part of the Android SDK Platform-Tools package, which is chiefly aimed at Android developers. I downloaded it from here.
The adb
The backbone of the Bridge is a couple of daemons. If you know nothing about Unix (in my opinion, the greatest intellectual adventure of the 20th century outside of quantum mechanics) you may be new to the concept of a daemon—a tight piece of code that sits inside the machine, largely independent of what’s going on around it, with specific duties to perform, waiting for specific signals to perform them.
One of these daemons is running on your computer, once you’ve launched adb, and the other is running inside your phone, once you’ve performed the magic to unleash it. More of that in a moment.
The two daemons talk to one another through a server process. Sometimes the word “server” means a chunk of special hardware running an operating system of its own. But in this case, the hardware is your computer and the server process is just another bunch of code that runs when required and shuts up when it’s not needed. That stop-start is a key distinction between a server process and a daemon. Daemons run continuously.
The server process also connects to the final element in this mix, the client. This is the interface through which you’ll be entering your instructions and seeing them carried out (or not).
If you’re used to a graphical user interface (GUI), the teletype, characters-only, interface of the command line is going to be a strange environment for you. You’re stepping back into what computing was in the days when only men (mainly men) in white coats were qualified to carry out these procedures.
So the basic idea is to tell the daemon running on your computer to tell the daemon running on your phone to find the Huawei Brower app—and zap it. The following procedure is for Windows 10, but adb under other operating systems works in the same way.
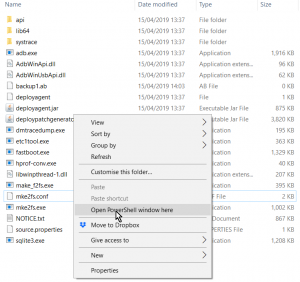
Download the platform-tools_r28.0.2-windows.zip file (version number may vary) and expand it completely into a folder, which by default will be called platform-tools_r28.0.2-windows. I assume we’re looking at this through Windows File Explorer. A double-click on the folder will take you into it, where you’ll find a second folder, just called platform-tools. Enter this folder too, with another double-click.
Position your cursor anywhere on the blank space at the bottom of the list of files you see, hold down the Shift key and right-click the mouse. On a modern laptop that will be Shift with a two finger tap on the trackpad.
This pops up a context menu, in the middle which you’ll see the option: Open PowerShell Window Here.
The Client
A “shell” in Unix-speak is a (usually) command line, text-based environment that metaphorically wraps around the operating system (hence the word “shell”). The shell brings a vocabulary of (supposedly) user-friendly commands that are interpreted in real time into machine-level instructions the operating system understands.
Windows PowerShell is a sophisticated development of the shell idea. But in this instance, we’re only using it to launch our own, adb shell. So let’s just try typing adb into the command line.
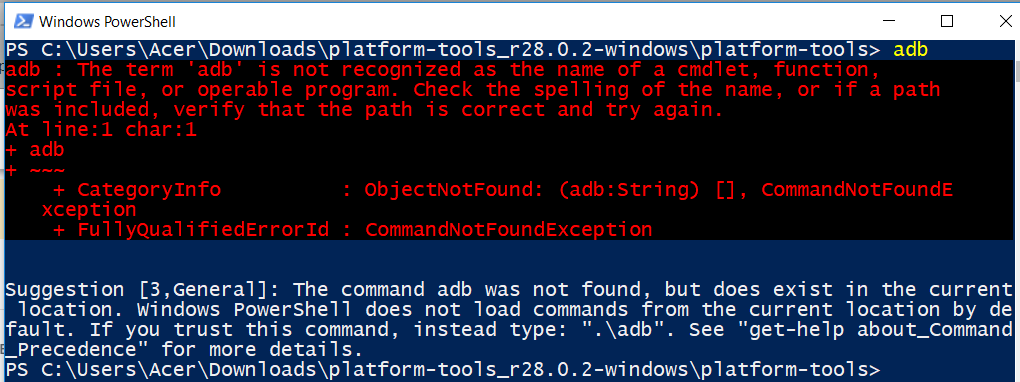
PowerShell gives us a sharp rap over the knuckles with a lengthy warning in red. But then, amusingly, it adds an apologetic postscript in white saying it recognises we might be trying to evoke adb.exe, which it knows is in the current directory, but we’d better do it the right way. Which, it helpfully suggests is .\adb.
Unix aficionados will hate this backslash. The correct way to evoke a command from the current folder in Unix is ./adb. The ./ means “in this current directory”. I was delighted to find that either slash works under PowerShell.
So now, let’s try ./adb
As we haven’t told adb what we want it to do, it’s now helpfully filled the screen with a complete menu of everything it’s capable of. In there you’ll see, under general commands there’s a function called devices.
This will give us a list of all the devices adb finds itself connected to. So now’s the time to connect the phone to the computer, using the USB cable provided by Huawei, to see if we can get adb and the phone to converse.
Making the Connection
Wire up the phone to the computer, type ./adb devices in the shell command line and you’ll see… nothing. That’s because we need to wake up that second daemon, the one that lives in the phone.
First, we’ll need to switch the phone into developer mode. On the phone, go into Settings and scroll down to find System right at the bottom. The top entry in Settings/System is About Phone. Enter this menu and you’ll see listed the Device Name (by default, Huawei P30 Pro, but you can edit this) and below that the model number (VOG-L29) and under that, the Build Number.
There’s no indication of this, but—as an Android standard feature—this Build Number entry is a secret button. Tap it quickly seven times (or more, if you’re in the mood) and your phone magically switches into developer mode.
We’re almost there. Step back one menu level into Settings/System and you’ll see a new option has appeared: Developer options. Under this menu you can switch on USB debugging. I’d also recommend switching on Allow ADB debugging in charge only mode, because that’s the default mode when you connect the USB cable. But remember to switch it off again when you’re done.
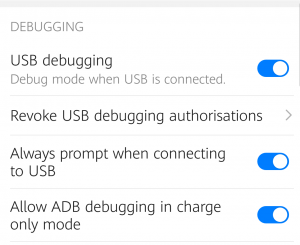
Turning on USB debugging.
Assuming your phone is still wired to the computer, you can now type ./adb devices into the shell and you should see the serial number of your phone listed. The bridge between the two daemons is now established.
Crossing the Bridge
So far we’ve run adb as a command. Now we’re connected we can run is as a shell. Unsurprisingly, the command to do this is: ./adb shell
You should now see a prompt that looks like this:
HWVOG:/ $
This where you evoke the Android package manager and tell it to uninstall the package it will know as com.huawei.browser.
HWVOG:/ $ pm uninstall -k ‑‑user 0 com.huawei.browser
(NB: that’s actually two contiguous hyphens in front of user.)
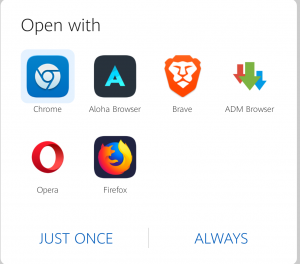
Browser choice restored.
Hit return at the end of that line and the deed will be done. The -k parameter tells the package manager not to remove any data or cache information associated with the Huawei Browser and ‑‑user 0 means that you’re asking on behalf of the primary user of the phone, which is you.
Paul O’Brien, the guiding light behind all this—I’m basically just typing this out—suggests you can use the same technique to remove any other bloatware annoyances. You can list all the apps on the phone with the command:
HWVOG:/ $ pm list packages
…and then pick the name or names you want to eliminate. But be careful—adb is powerful stuff.
Chris Bidmead: 16-Apr-19
